Insertion into the job
From Opera Wiki
 ; then, click the button
Through this framework, you can enter and manage:
Contents |
Typology
![]() : opens the Select typology framework. Then, select the type to insert in the job; confirming with
: opens the Select typology framework. Then, select the type to insert in the job; confirming with ![]() will open the General info - type panel.
will open the General info - type panel.
Price List Item
![]() : after the Select price list item panel is opened, select the typology to add to the job; confirming with
: after the Select price list item panel is opened, select the typology to add to the job; confirming with ![]() opens the General info - type panel.
opens the General info - type panel.
Parts
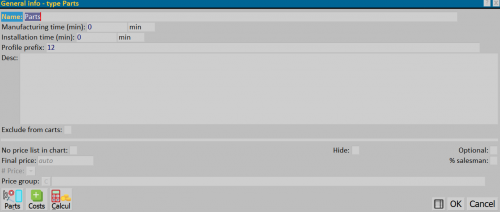
![]() : press this button to open the picture shown in Fig.1:
: press this button to open the picture shown in Fig.1:
- Name: this field represents the name of the Bill of Materials associated with the job.
- Manufacturing time (min.): are the minutes required for the labor of the selected Parts type.
- Installation time (min.): are the minutes required for the installation of the selected Parts type.
- Profile prefix: is the identification code of the Parts type.
- Desc: in this field, you can enter a description.
- Exclude from carts: if active, you can exclude this list from being included in the carts during cart management.
- No price list in chart: excludes this Parts type from the chart.
- Hide: if active, hides the materials, which wont appear in the chart.
- Optional: if active, allows these ‘'Parts types’' to be set as optional.
- Final price: allows the ‘'Parts type’' to be associated with a selling price.
- % salesman: if active, allows to consider the percentage of the salesmen on the Parts Typology.
- # Price
 : is activated if ‘’'Multi-discount management'‘’ is selected in the Company data the field.
- Price group
 : opens the framework that allows you to match a Price Group Selection to the material.
 : allows you to enter the Bill of materials box to add bulk material within the order.
 : opens the panel Typology calculations.
 : allows you to check the calculations of Parts type.
Cutting list
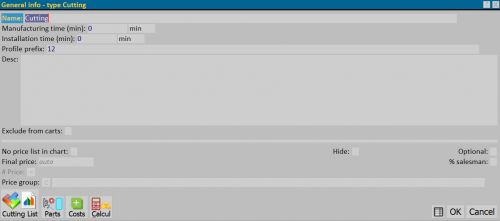
![]() : this button opens the picture shown in Fig.2:
: this button opens the picture shown in Fig.2:
- Name: is the name of the bill of materials.
- Manufacturing time (min.): are the minutes required for the labor of the selected Cutting type.
- Installation time (min.): are the minutes required for the installation of the selectedCutting type.
- Profile prefix: is the Cutting type identification code.
- Desc: in this field, you can enter a description.
- Exclude from carts: if active, you can exclude this list from the charts when using the charts management.
- No price list in chart: excludes the selected Cutting type from the chart.
- Hide: if active, hides the material, which wont appear in the chart.
- Optional: if active, allows the selected Cutting type to be set as optional.
- Final price: allows the Cutting type to be associated with a selling price.
- % salesman: if active, allows to consider the percentage of the salesmen on the Cutting type.
- # Price
 : is activated if ‘’'Multi-discount management'‘’ is selected in the Company data the field.
- Price group
 : opens the framework that allows you to match a Price Group Selection to the material.
 : pressing this key will allow you to enter the Cutting List frame.
 : allows you to enter the Bill of materials box to see the entire material generated from the cutting list.
 : opens the panel Typology calculations.
 : allows you to check the calculations of Cutting type.
Extra cost
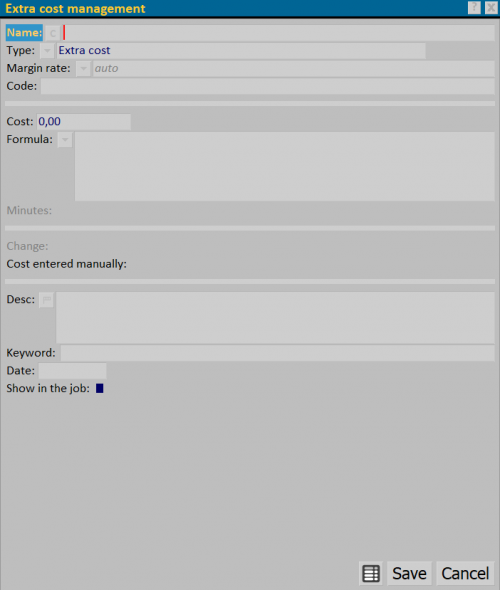
![]() : press this button to open the picture
shown in Fig.1:
: press this button to open the picture
shown in Fig.1:
type for the extra cost.
choose the type of margin rate to match.
- Code: extra cost code.
- Cost:cost of the extra job model .
- Formula:formula to be used for the cost of the extra job model.
- Minutes:time cost in minutes in the case of 'Type (e.g. Minutes
Manufacturing, Minutes of Installation and Minutes of Control Frames).
- Replace: when presented with a Type compatible cost (Ex: Cost of profiles, Cost
acc. mont. , etc.), by activating the check it will be possible to replace the amount.
- Manually entered cost: indicates that it is a manually entered cost
- Description:allows you to enter a description.
- Keyword: custom search key.
- Data”: date of entry extra cost.
- Show on job: if enabled, the cost will be shown as a position in
for a quick view.
Job lines
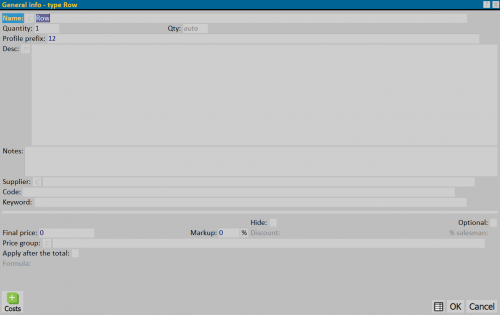
- Name:is the name of the job lines.
- Number of pieces:shows the quantity of pieces to add.
- Profile prefix:is the identifier of the “Job lines”.
- Desc.:allows you to enter a description .
- Notes:field allowing the insertion of a note.
- Supplier:
 : the matching button opens the frame that allows to select the supplier.
- Code: field that allows to match a code to the job lines.
- Keyword: custom search key.
- Hide: if this option is enabled, it hides the job lines, which wont appear in the Chart.
- Optional:if enabled, it allows to set as optional the selected “Job lines”.
- Final price: allows you to associate a price of sale to the job lines.
- Increment:increases by matching a percentage to the price of sale.
- Discount:allows you to match a discount to the “Job lines”.
- % salesman.”: if enabled, it allows to consider the percentage of the salesmen
on the selected “Job lines”.
price group to the order line.
- Apply after the total: if selected, apply the price after calculating the total
in the Chart press.
- Formula: in this field, it is shown the formula matched to the job lines created in Job lines archive.
The  button opens the picture of cost management.
Job
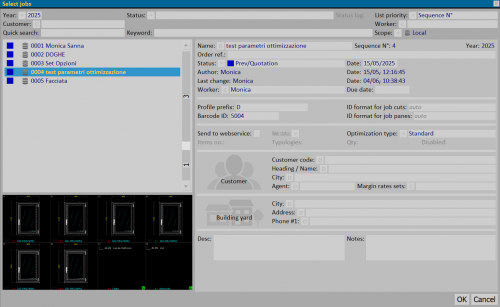
![]() Selecting the Job button will open the selection of jobs as shown in Fig.3.
Selecting the Job button will open the selection of jobs as shown in Fig.3.
Filters (by Year, State, etc...) are available.
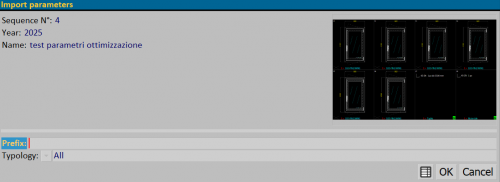
Once the job you intend to import has been selected, a menu opens with the following information:
- Progressive: shows the progressive of the selected job.
- Year: shows the year of the selected job.
- Name: shows the name of the selected job.
- Prefix: is the identifier code of the typologies that will be imported. If left blank, the program will automatically assign a progressive.
- Typology:
 allows to choose what to import from the selected job:
- ”All”: all typologies of the job will be entered.
- ”01” - ...: the first typology will be inserted.
- ”02” - ...: the second typology will be inserted.
- “ ... - …” : .......

