How to manage text formatting
From Opera Wiki
(Difference between revisions)
Monica.Sanna (Talk | contribs) (→Italic) |
Monica.Sanna (Talk | contribs) |
||
| (16 intermediate revisions not shown) | |||
| Line 1: | Line 1: | ||
| - | + | {{NB|The format of document text can be customized using html tags. A tag is an property enclosed within <nowiki>"< | >" </nowiki> symbols. Here below the list of the tags you can use in documents and descriptions: the computed text format will also be displayed in the documents (the offer, for exaample.)}} | |
| - | + | ||
| - | + | ||
| - | + | ||
| - | {{NB|The | + | |
== Bold == | == Bold == | ||
| - | *<nowiki> <b> </nowiki> <b> Opera Company </b> <nowiki> </b> </nowiki> or <nowiki><strong> </nowiki> <strong>Opera Company</strong><nowiki></strong> </nowiki>: using these | + | *<nowiki> <b> </nowiki> <b> Opera Company </b> <nowiki> </b> </nowiki> or <nowiki><strong> </nowiki> <strong>Opera Company</strong><nowiki></strong> </nowiki>: using these tags you to set the text within the tag in '''bold''' |
{| | {| | ||
| - | |[[File:tipologiadescrizione.png|500px|left| | + | |[[File:tipologiadescrizione.png|500px|left|Bold format example]] |
| - | |[[File:tipologiadescrizione2.png|500px|center| | + | |[[File:tipologiadescrizione2.png|500px|center|bold text]] |
|} | |} | ||
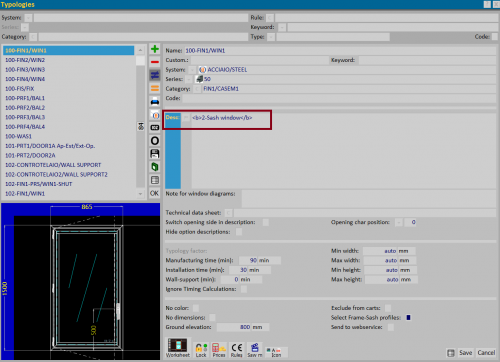
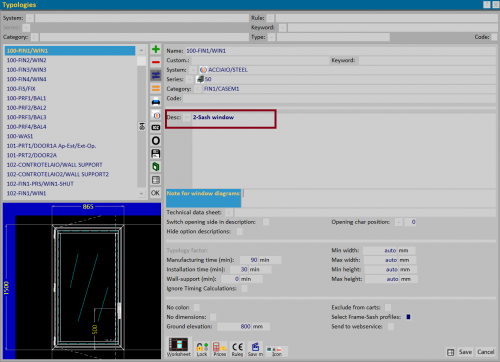
| - | The first | + | The first picture shows how to add the text between the chosen tags; the result text is displayed when you move to another field or save the type (see second picture). |
| - | + | You can also edit the text of the offers using tagss: the formatted result text is shown when the document is saved. | |
{| | {| | ||
|[[File:documentoformattazione.png|500px|left|TAG example for bold]] | |[[File:documentoformattazione.png|500px|left|TAG example for bold]] | ||
| Line 20: | Line 16: | ||
{{BR}} | {{BR}} | ||
| - | The formatted text will be shown in the | + | The formatted text will be shown in the printout document |
[[File:preventivoformattato.png|500px|border]] | [[File:preventivoformattato.png|500px|border]] | ||
| Line 27: | Line 23: | ||
== Italic == | == Italic == | ||
| - | *<nowiki> <i> </nowiki> <i>Opera Company</i> <nowiki> </i> </nowiki> or <nowiki><em></nowiki> <em> Opera Company </em> <nowiki> </em> </nowiki>: | + | *<nowiki> <i> </nowiki> <i>Opera Company</i> <nowiki> </i> </nowiki> or <nowiki><em></nowiki> <em> Opera Company </em> <nowiki> </em> </nowiki>: using these TAGs it is possible to format the text inserted in ''italic'' |
== Highlight words and phrases == | == Highlight words and phrases == | ||
| - | + | *<nowiki><mark></nowiki><span style="background-color:yellow">Opera Company </span> <nowiki></mark></nowiki> or <nowiki><mark color="red"></nowiki><span style="background-color:red">Opera Company </span><nowiki></mark></nowiki>: using these TAGs it is possible to highlight the text. It is possible to view a list of colors at the following link [https://en.wikipedia.org/wiki/Help:Using_colours]. | |
== Superscript and subscript == | == Superscript and subscript == | ||
| + | *Opera <nowiki><sub></nowiki>Company <nowiki></sub></nowiki>: using these TAGs we can set a character, a number or a word to subscript. Ex.: Opera<sub>Company</sub>. | ||
| + | *Opera <nowiki><sup></nowiki>Company <nowiki></sup></nowiki>: using these TAGs we can set a character, a number or a word to superscript. Es.: Opera<sup>Company</sup>. | ||
== Underline or delete words and phrases== | == Underline or delete words and phrases== | ||
| + | *<nowiki><u></nowiki> <u>Opera Company</u> <nowiki></u></nowiki> or <nowiki><ins></nowiki> <ins>Opera Company</ins><nowiki></ins></nowiki>: using these TAGs we can underline one or more words. | ||
| + | *<nowiki><s></nowiki> <s>Opera Company</s><nowiki></s></nowiki> or <nowiki><del></nowiki> <del>Opera Company</del><nowiki></del></nowiki>: using these TAGs we can delete one or more words. | ||
== Font size == | == Font size == | ||
| + | *<nowiki><small></nowiki> <small>Opera Company</small><nowiki></small> </nowiki>: using these TAGs we can make the font smaller. | ||
| + | *<nowiki><big></nowiki><big>Opera Company</big> <nowiki></big> </nowiki>: using these TAGs we can make the font bigger. | ||
== Font Monospaced == | == Font Monospaced == | ||
| - | + | *<nowiki><tt></nowiki> <tt>Opera Company</tt><nowiki></tt></nowiki>: using these TAGs we can set a monospaced font, that is a font with characters that all have the same horizontal space. | |
== Font == | == Font == | ||
| + | |||
| + | *<nowiki><font face="Times New Roman"></nowiki> <font face="Times New Roman"> Opera Company </font><nowiki></font></nowiki>: using these TAGs we can set a different font than the default. | ||
| + | |||
| + | *<nowiki><font color="red"></nowiki> <font color="red"> Opera Company </font><nowiki></font></nowiki>: using these TAGs we can set a different color than the default. | ||
| + | |||
| + | It is possible to use the previous TAGs together and set a font and color other than the default ones. | ||
| + | *<nowiki><font face="Times New Roman" color="red"></nowiki> <font face="Times New Roman" color="red"> Opera Company </font><nowiki></font></nowiki>. | ||
| + | |||
| + | {{NOTE|the font list can be viewed in ''Theme'' panel, under the ''Options'' menu.}} | ||
Latest revision as of 08:32, 14 March 2022
Contents |
Bold
- <b> Opera Company </b> or <strong> Opera Company</strong> : using these tags you to set the text within the tag in bold
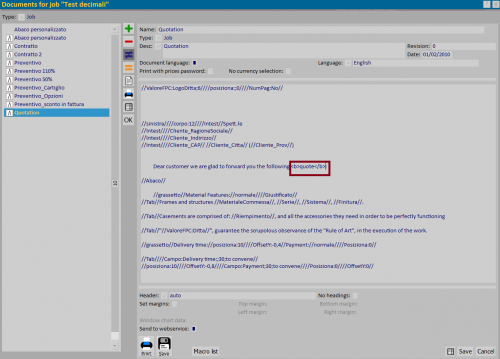
The first picture shows how to add the text between the chosen tags; the result text is displayed when you move to another field or save the type (see second picture). You can also edit the text of the offers using tagss: the formatted result text is shown when the document is saved.
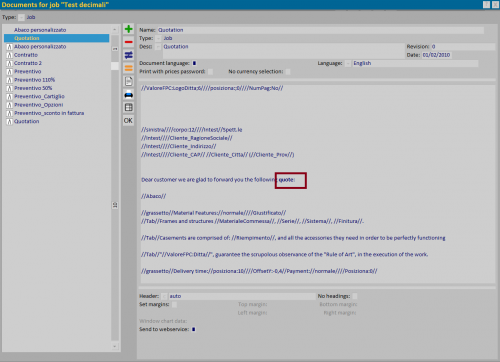
The formatted text will be shown in the printout document
Italic
- <i> Opera Company </i> or <em> Opera Company </em> : using these TAGs it is possible to format the text inserted in italic
Highlight words and phrases
- <mark>Opera Company </mark> or <mark color="red">Opera Company </mark>: using these TAGs it is possible to highlight the text. It is possible to view a list of colors at the following link [1].
Superscript and subscript
- Opera <sub>Company </sub>: using these TAGs we can set a character, a number or a word to subscript. Ex.: OperaCompany.
- Opera <sup>Company </sup>: using these TAGs we can set a character, a number or a word to superscript. Es.: OperaCompany.
Underline or delete words and phrases
- <u> Opera Company </u> or <ins> Opera Company</ins>: using these TAGs we can underline one or more words.
- <s>
Opera Company</s> or <del>Opera Company</del>: using these TAGs we can delete one or more words.
Font size
- <small> Opera Company</small> : using these TAGs we can make the font smaller.
- <big>Opera Company </big> : using these TAGs we can make the font bigger.
Font Monospaced
- <tt> Opera Company</tt>: using these TAGs we can set a monospaced font, that is a font with characters that all have the same horizontal space.
Font
- <font face="Times New Roman"> Opera Company </font>: using these TAGs we can set a different font than the default.
- <font color="red"> Opera Company </font>: using these TAGs we can set a different color than the default.
It is possible to use the previous TAGs together and set a font and color other than the default ones.
- <font face="Times New Roman" color="red"> Opera Company </font>.
the font list can be viewed in Theme panel, under the Options menu.


