How to make a dumpster
From Opera Wiki
In the Archive Types framework click ![]() , then below select the File:Design.png button to open the Design Sheet' framework. Click File:+inser.png to open the Type selection panel, and following that click File:New.png, to enter the Structure definition panel; After setting the values of System and Series, select in the Structure field the type Pre-assembled box or Box with cover;
, then below select the File:Design.png button to open the Design Sheet' framework. Click File:+inser.png to open the Type selection panel, and following that click File:New.png, to enter the Structure definition panel; After setting the values of System and Series, select in the Structure field the type Pre-assembled box or Box with cover;
By clicking the File:Mod.sides.png button, the program will wait for you to set a profile in the bottom side of the shutter box; at this point, click ![]() to put a shutter box profile in the bottom side: the Add Profiles frame will be opened; choose File:Shutter box.png and the Shutter Box selection frame belonging to the chosen system and series will be opened; look for the frame profile you prefer and confirm. The operation should be repeated to put in the front profile. Click
to put a shutter box profile in the bottom side: the Add Profiles frame will be opened; choose File:Shutter box.png and the Shutter Box selection frame belonging to the chosen system and series will be opened; look for the frame profile you prefer and confirm. The operation should be repeated to put in the front profile. Click ![]() to put in the roller shutter, choose File:Battenavv.png and the profile add picture will be opened: select
to put in the roller shutter, choose File:Battenavv.png and the profile add picture will be opened: select ![]() . Select
. Select ![]() again to put in the end batten, choose File:Battencatermina.png the profile add picture will be opened: select
again to put in the end batten, choose File:Battencatermina.png the profile add picture will be opened: select ![]() .To put in the roller again click
.To put in the roller again click ![]() and choose File:Roller.png it will open the add profiles picture: select
and choose File:Roller.png it will open the add profiles picture: select ![]() .Now move to the top side, click
.Now move to the top side, click ![]() and select File:Counterframe.png to put in the top profile File:Splint.png.
and select File:Counterframe.png to put in the top profile File:Splint.png.
Insertion of accessories
Click on the File:Keyfix.png button, to assign accessories, the program will open the Fixed frame structure accessories framework; click on the ![]() button and the File:Code.png button, the accessory use framework will be opened; click on File:Kitcass.png, the program will open the list of the box accessory kits in the archive; search for the one you prefer and confirm with
button and the File:Code.png button, the accessory use framework will be opened; click on File:Kitcass.png, the program will open the list of the box accessory kits in the archive; search for the one you prefer and confirm with ![]() . The program will return to the 'Fixed frame structure accessories' panel; click the File:Record.png button.
. The program will return to the 'Fixed frame structure accessories' panel; click the File:Record.png button.
Click again on the ![]() button and the File:Code.png button, to reopen the accessory use picture; click File:Capocass.png, the program will open the list of the dumpster caps in the archive (the dumpster cap determines the height of the dumpster itself; search for the one you prefer and confirm with
button and the File:Code.png button, to reopen the accessory use picture; click File:Capocass.png, the program will open the list of the dumpster caps in the archive (the dumpster cap determines the height of the dumpster itself; search for the one you prefer and confirm with ![]() , the program will return to the Fixed frame structure accessories frame; click the File:Record.png button and the
, the program will return to the Fixed frame structure accessories frame; click the File:Record.png button and the ![]() button to close the frame. Now the window is to be drawn in the Design Sheet: the structure becomes a type. After defining the structure click on the File:Record.png button you will find in the upper right corner, which will allow you to confirm the structure you have created and draw it in the Design Sheet:
button to close the frame. Now the window is to be drawn in the Design Sheet: the structure becomes a type. After defining the structure click on the File:Record.png button you will find in the upper right corner, which will allow you to confirm the structure you have created and draw it in the Design Sheet:
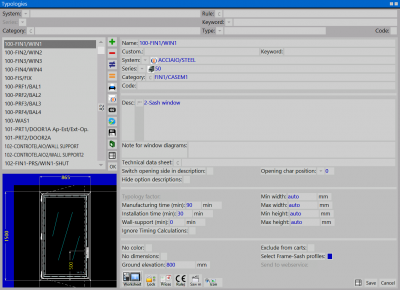
You may have noticed that the mouse pointer has changed in appearance: now point to the top left and click, then release; drag the mouse crosswise to the right, from top to bottom, until the type is sized, as in the figure: Now click the File:X.png button to return to the general data for the type; in the 'Name' box type a name for the type (e.g., CASS1); in the 'Pers' (Customization) box type a code customization, if you want, (e.g., CASS1); in the 'System' and 'Series' boxes type a system and series, respectively, under which you want to register the type (e.g., CASS1); in the 'System' and 'Series' boxes type a system and series, respectively, under which you want to register the type (e.g., CASS1); in the 'System' and 'Series' boxes type a system and series, respectively, under which you want to register the type.: Pre-assembled Dumpster); in the 'Labor Minutes' and 'Laying Minutes' boxes, respectively, type in the minutes it takes to perform the installation then the minutes it takes to lay the type; now click on the File:Record.png button to record the type in the archive.


