How to create a new job
From Opera Wiki
Contents |
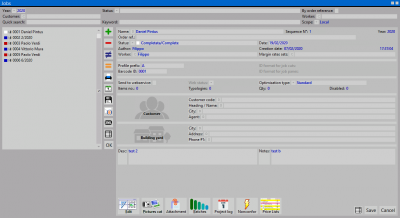
We click on the ![]() button to enter a new job order: the program automatically enters the progressive number of the job order and the year in the relevant fields; the cursor is on the name field, where the customer's data must be entered, opening the next frame from the File:Keyod.png button.
button to enter a new job order: the program automatically enters the progressive number of the job order and the year in the relevant fields; the cursor is on the name field, where the customer's data must be entered, opening the next frame from the File:Keyod.png button.
After saving the data, we return to the main frame: we will notice that these data appear in the customer part of the frame. We can enter an order reference in the field Order Ref., in case, for example, there are several orders from the same customer.
In the field Status ![]() we specify what type of order we are entering, and in Optimization Type
we specify what type of order we are entering, and in Optimization Type ![]() the type of optimization.
the type of optimization.
Statocommessa.png
Status of the order |
The field Yard is essential to define the location where the window and door frame will be installed, and that will allow us to establish what are the thermal transmittance limit values of window and door frames and/or glass imposed by current regulations. All File:Keyod.png buttons open the panel where we will enter the data of the construction site.
Under Cities', selecting the File:Keyoc.png button will take you to the Municipality selection panel, in which you can find the data of all municipalities in Italy. In case such data are not present, simply enter the exact name of the municipality concerned in the frame that is opened by clicking on the ![]() button and register it; the program will automatically enter all useful information to identify the correct climatic zone to which it belongs.
button and register it; the program will automatically enter all useful information to identify the correct climatic zone to which it belongs.
Finestraselezionecomune.png
Common selection |
Finestragestionetabellacomuni.png
Common table management and C.A.P. |
The Management button
After entering all the useful data to define the job, we press the File:Keymanagement.png button, and access the Job management panel. We select the File:+inser.png button, and in the message that appears we choose Type.
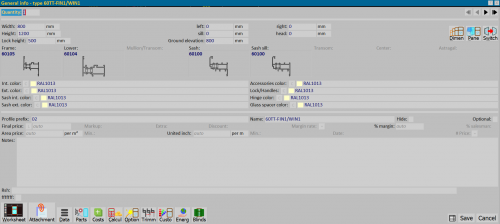
The Type selection panel will then open where we will set the system and the series; we will select the type and confirm with ![]() . After this operation, the General Data pane of the typology will open:
. After this operation, the General Data pane of the typology will open:
Now we type in the number of pieces (field Number of pieces), set the perimeter dimensions, click on File:Code.png to choose the coloring, and confirm with File:Keypadgistra.png.
The program will return to the Job Management panel, where it will report the type you have loaded. If you want to load other types repeat the operations seen so far.
Pressing the File:Fill.png button will open the Fill Management panel, where we can apply fill to the type:
Click on ![]() , choose the filler, gaskets (outer and inner) and glass bead; finally confirm with File:Register.png and
, choose the filler, gaskets (outer and inner) and glass bead; finally confirm with File:Register.png and ![]() .
.
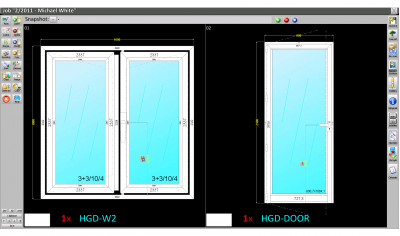
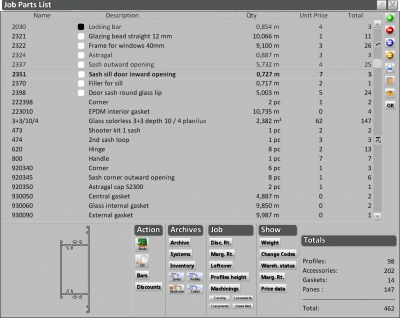
We are back in the Job Management panel, where we see the type with glass. It is now necessary, before sending the job to processing, to make some checks, for example, on the materials and on the calculations in the estimate. Press, therefore, on the File:Keymaterials.png button, the Job Materials panel will open.
After you have verified the materials that make up the job order, proceed to print the order to the supplier and press the File:Keydistinct.png button located at the bottom left, the Print Bill of Materials pane will open:
Inside we find the list of materials with the quantities to be ordered, data pertaining to the selected items, and the titles of the printouts. We click on File:Keyprint.png to start the printouts. The program opens a panel where we select our print options and possibly see a preview.
Quadrostampadistinta.png
The framework of printing options |
Esempiostampadistinta.png
Print example |
After you have made the printouts of the order to the supplier, to exit the panel press the File:Cancel.png button, then press the ![]() button to exit the Job Materials panel, and return to the Job Management panel.
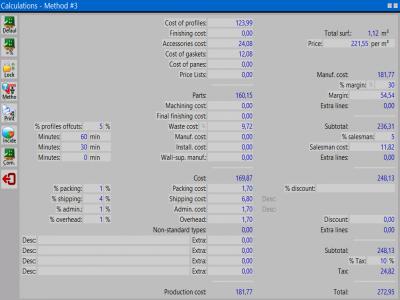
From this position press the File:Keycalculations.png button, the Calculations panel will open:
in this panel you will have the possibility to check the amounts, calculation of percentages, profit, V.A.T. etc.
button to exit the Job Materials panel, and return to the Job Management panel.
From this position press the File:Keycalculations.png button, the Calculations panel will open:
in this panel you will have the possibility to check the amounts, calculation of percentages, profit, V.A.T. etc.
When you have finished the checks and any additions press the File:X.png button to re-enter the Job Management panel.
Now we can print the estimate to the customer. Press the File:Keydocuments.png button, the Job Documents panel will open:
Pressing the File:Keyprint.png button will open the picture we have already seen for the bill of material, where we can start printing. In the following image you can see a typical printout of the quote to the customer.
Now press the ![]() button to exit the document panel.
button to exit the document panel.
To make processing printouts, press the File:Keycheck.png button, the Print Options pane will open:
The example figure shows you to select only those that are typical processing printouts. If you need additional printouts for your work organization, all you have to do is activate the ones you need and send them to print with the ![]() button.
button.
The program, at this point, opens the Profile Selection pane, where you can, for example, decide to turn profiles on or off for printing. Click on [[File:ok.png] and perform the printing operations seen earlier The following figures show you images of the prints selected in the example:
Esempiostampataglioottimizzato.png
Taglio Ottimizzato |
Esempiostampaschemacompleto.png
Schema Completo |
You can then start the cutting and assembly operations of your window. After you have made the processing printouts press the File:Cancel.png button to exit the printing options. You are then back in the Manage Job frame, press the File:X.png button and you will return to the initial frame. Finally, press the File:Register.png button to archive your Job Order.
