How to manage 3D prints
From Opera Wiki
Revision as of 20:41, 23 September 2024 by Lyna.Ferhi (Talk | contribs)
Contents |
The following are the steps for managing 3D rendering:
Installation
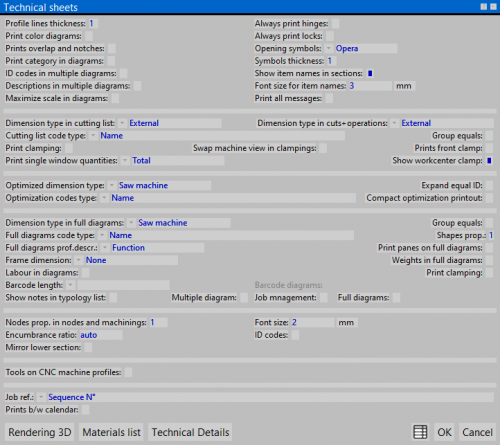
- Go to Workshop --> Technical Print Setup
- Click on the button File:Tastorendering3d.png
- Perform the installation procedure (if necessary)
Instmediapack1.png
Step 1 |
Instmediapack2.png
Step 2 |
Instmediapack3.png
Step 3 |
Instmediapack4.png
Step 4 |
Instmediapack5.png
Step 5 |
Rendering configuration
File:Finestrasetuprendering.png
The 3D rendering setup framework
- Go to Workshop --> Technical Print Setup and press File:Tastorendering3d.png. The rendering setup panel will open. Within it you can set the parameters of the 3D type previews that Opera is to generate.
Image generation
3D image generation is done within the individual type in the job order.
- Go to Job Orders --> Management to open the job order list
- Select the desired job order (or first create a new one) and press the File:Keydiverse.png button. The list of types in the job order will be shown.
- Click on the File:Keycards.png button and choose the type of 3D print (Patterns or Abacus) and proceed with printing. The program will propose to you after rendering the 3D images in the chosen prints.
File:Temporendering.png
300px
Stampe
File:Preventivo3d.png
an example of a 3D quote
It is possible to make different types of prints:
- Abaco 3D
- Schemi 3D
To activate these printouts follow the steps below:
- Bring yourself within the framework of management
- Press the File:Keychecks.png button. This will open the window of job prints
- Select the desired print type (Abacus 3D types / Schematic 3D types) and press

Schema3d.png
an example of a 3D schematic |
Abaco3d.png
an example of a 3D abacus |
The following steps should be followed to make a 3D image quote print:
- Take yourself to the Archives framework --> Documents
- Select the document normally used for printing the quote and duplicate it by pressing the File:Equal key.pngSelect the document normally used for printing the quote and duplicate it by pressing the File:Equal key.png
- Give a different name to the newly created document (example: 3D Quote)
- Edit the newly created document, replacing the macro //Abaco// with //Abaco3D//
- Save the document
Whenever you want to print a 3D quote, from the Job Documents panel, select the 3D quote and print normally.


