How to create a new accessory
From Opera Wiki
Contents |
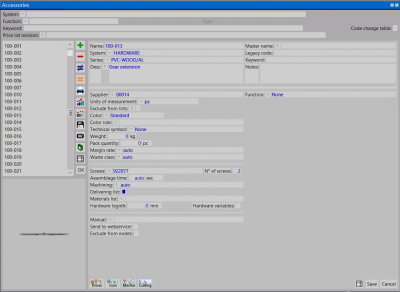
Remember that to learn more about the contents, function of the buttons and boxes you can see in Section 1, chapter The Accessory Archive, paragraph Description of the Contents of the Accessory Archive.
- Click the
 button to begin.
- Enter the code name.
- Determine the system and series to which it belongs.
- Describe the characteristics.
- Establish the unit of measurement
- Set the technical symbol and usage.
The operation described in 6) is very important for some accessories (handles, hinges...), to make sure that it is reported by the program in the type project. The usage is also important, because based on it the program will add boxes that the operator can fill in ,which can be about the automatic insertion of the accessory into the type, or data useful to the program in the development of calculations, cuts etc..
The accessory has been created, confirm by clicking ![]() and
and ![]() until you return to the opera menu bar.
until you return to the opera menu bar.
How to assign prices to an accessory
To assign prices to an accessory, we open the Accessory Archive panel by selecting Accessories from the menu:
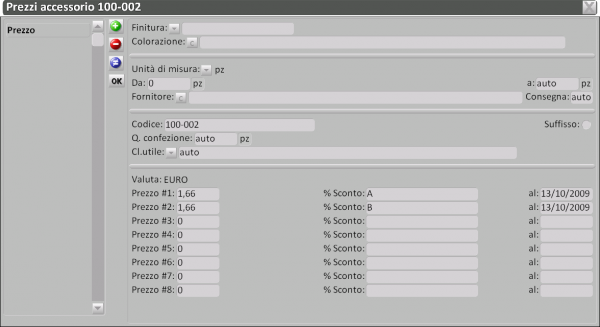
Select the File:Keyodiverso.png button to enter inside the accessory and then select File:Prezzi.png; in the next box click ![]() to enter data:
to enter data:
Determine finish or coloration. If you manage prices based on finishes, remember that you do not need to enter the coloration as well as explained in the relevant section and chapter ; conversely, if you manage prices based on colorations not tied to a finish, you do not need to enter the finish. Type in the price and, if applicable, enter the discount percentage. Now you can register by pressing ![]() .
.
If you want to enter other prices related to other colors or finishes repeat the operation, otherwise press ![]() to exit the picture.
to exit the picture.
How to assign the supplier to the price of an accessory
- We enter the Accessories Archive and select the File:Prices.png button.
- In the Accessory Pricing framework we upload the prices to the component and match for each price the supplier (see images below) File:Archiprezzicolor.png
- Go to the Job Material panel and select the File:Keystatomagazzino.png
- Identify the component to be handled ( for example, the presser)
- Select the accessory in the supplier column: the Supplier Selection panel will open.
- Choose the provider and confirm.
- Uncheck the File:Keystatomagazzino.png button: at this point the price of the chosen supplier will be displayed.
File:Quadrostatomagazzino2.png


