How to manage price groups
From Opera Wiki
(Difference between revisions)
Monica.Sanna (Talk | contribs) |
Lyna.Ferhi (Talk | contribs) |
||
| (12 intermediate revisions not shown) | |||
| Line 1: | Line 1: | ||
__TOC__ | __TOC__ | ||
| + | {{BR}} | ||
[[File:finestraarchiviogruppiprezzo.png|600 px|thumb|right]] | [[File:finestraarchiviogruppiprezzo.png|600 px|thumb|right]] | ||
| Line 17: | Line 18: | ||
== Job Entry == | == Job Entry == | ||
| - | [[File: | + | [[File:Datitipcommessajuste.png|thumb|500 px]] |
| + | |||
| + | * Now, go back to menu and go to '''Jobs''' panel, then go to '''Edit jobs''' , after choosing the job, then select '''Edit''', and pick one of the items in the screen to open the ''''General info - type''', then select the [[File:tastodata.png]] button to open the '''Typology data on the job''' panel. | ||
| - | |||
* Through the [[File:tastoc.png]] button combined with the '''Price Group''' field, select the group to match the typology. | * Through the [[File:tastoc.png]] button combined with the '''Price Group''' field, select the group to match the typology. | ||
| Line 28: | Line 30: | ||
[[File:preventivogruppiprezzo.png|thumb|500px]] | [[File:preventivogruppiprezzo.png|thumb|500px]] | ||
| - | + | Go to '''Job ""''' again and select '''Print'''. On '''Print Option''', proceed with the printing of the quote, being sure to activate in the '''Window Chart'''' (see the chapter [[Window chart print settings]]). | |
{{BR}} | {{BR}} | ||
== Related Items == | == Related Items == | ||
*[[Price Groups]] | *[[Price Groups]] | ||
Latest revision as of 18:29, 20 February 2025
Contents |
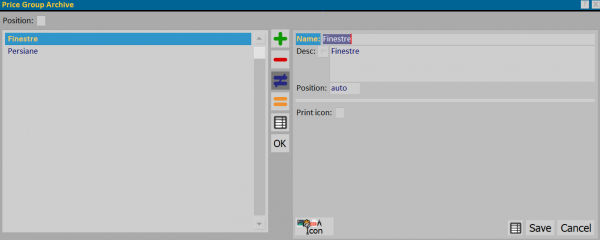
The purpose of' Price Group Archive is to be able to separate from the total budget, the amounts related to the different price items (Windows, Door-window, Blinds, Laying, Labour....).
Price Group Archive Creation
- Press the
 button to create a price group.
- Enter a name and description
- Enter a possible position.
- If we activate the item Print icon, the image, combined with the group via the
 button, will be printed in the quote.
Job Entry
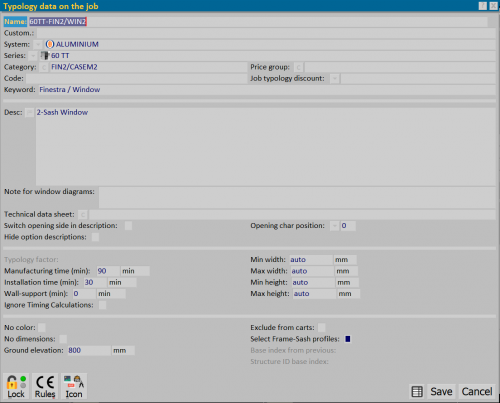
- Now, go back to menu and go to Jobs panel, then go to Edit jobs , after choosing the job, then select Edit, and pick one of the items in the screen to open the 'General info - type, then select the
 button to open the Typology data on the job panel.
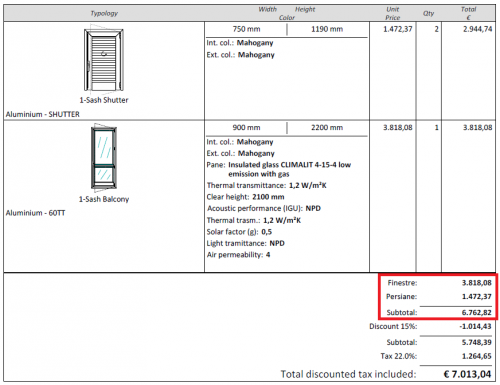
Display in the quote
Go to Job "" again and select Print. On Print Option, proceed with the printing of the quote, being sure to activate in the Window Chart' (see the chapter Window chart print settings).


