MTM Management
From Opera Wiki
Monica.Sanna (Talk | contribs) (→Sash management) |
Monica.Sanna (Talk | contribs) |
||
| (11 intermediate revisions not shown) | |||
| Line 1: | Line 1: | ||
| + | {{NB|To access this panel, open the '''Worksheet''', click on the mirror and select the [[File:tastoMTM.png]] button in the next panel.}} | ||
| + | |||
[[File:finestragestioneMTI.png|500 px|thumb|right|Management panel for mullions, transoms and muntins]] | [[File:finestragestioneMTI.png|500 px|thumb|right|Management panel for mullions, transoms and muntins]] | ||
| Line 11: | Line 13: | ||
==Archive buttons== | ==Archive buttons== | ||
| - | *[[File:Tastoriempimenti.png]]:opens the management framework of the [[ | + | *[[File:Tastoriempimenti.png]]:opens the management framework of the [[Panes management|typology management]]. |
| - | *[[file:tastoinglesine.png]]: open the [[Muntins | + | *[[file:tastoinglesine.png]]: open the [[Muntins|muntins management]] framework. |
{{BR}} | {{BR}} | ||
| Line 18: | Line 20: | ||
==Action keys== | ==Action keys== | ||
| - | *[[File:tastoposizionariempimento.png]] '''Placement of | + | *[[File:tastoposizionariempimento.png]] '''Placement of panes(glasses, panes or slatted panes)''': After defining the [[Panes management|typology panes]], you can place them in the various mirrors by pressing this button first, called positioner, and then selecting with the mouse pointer the part of the mirror where you want to place the pane, as many times as necessary until the code of the pane itself appears. Please know that a code like R#1 or R#2 or R#3 etc... means that it is a nonexistent pane or it has been created, but the glass (or panel) code is missing. |
[[File:impostariempimentispecchiatura.png|thumb|right|400px]] | [[File:impostariempimentispecchiatura.png|thumb|right|400px]] | ||
| - | *[[File:tastosovrapponiriempimento.png]] ''' | + | *[[File:tastosovrapponiriempimento.png]] '''Panesoverlap''': after defining [[Panes management|typology panes]] and after setting them in the place you prefer (as explained in the previous paragraph), through this button you can place a pane where one already exists by first pressing the button and then selecting the mirroring where you want to place the pane: |
| - | will open the panel on the side, where we will add the | + | will open the panel on the side, where we will add the pane to be overlapped. |
| - | This procedure is useful in case of overlapped | + | This procedure is useful in case of overlapped pane on a single mirroring (ex: glass+panel) |
{|| | {|| | ||
| - | [[File:posizioneriemp.png|Detail of the active area within which the | + | |[[File:posizioneriemp.png|Detail of the active area within which the panes have been placed|thumb|right|300px]] |
| - | |[[File:posizioneriemp2.png|Detail of the Active Area in which the two | + | |[[File:posizioneriemp2.png|Detail of the Active Area in which the two panes codes within a single mirroring are visible|thumb|right|300px]] |
|} | |} | ||
| - | *[[File:tastoinglesine2.png]] '''Deactivation/Activation of muntin''':if the profiles for the muntin have been defined, in the[[Muntins archive]], the muntin will appear on all the mirrors of the structure because by default the program considers all the mirrors to be active. | + | *[[File:tastoinglesine2.png]] '''Deactivation/Activation of muntin''':if the profiles for the muntin have been defined, in the [[Muntins|muntins archive]], the muntin will appear on all the mirrors of the structure because by default the program considers all the mirrors to be active. |
However, by pressing this button and selecting the part of the mirroring chosen with the mouse pointer, it will be possible to activate or deactivate the chosen muntin. This is useful, for example, to be able to make structures with muntins only in the upper mirroring or on the lower mirroring. | However, by pressing this button and selecting the part of the mirroring chosen with the mouse pointer, it will be possible to activate or deactivate the chosen muntin. This is useful, for example, to be able to make structures with muntins only in the upper mirroring or on the lower mirroring. | ||
| Line 44: | Line 46: | ||
*[[File:controllo2.png]]: This element shows the structure by highlighting in white the current frame, that is, the one on which the operation will take place. Normally, in the case of structures with more than one sash, the operation will occur on all sashes. | *[[File:controllo2.png]]: This element shows the structure by highlighting in white the current frame, that is, the one on which the operation will take place. Normally, in the case of structures with more than one sash, the operation will occur on all sashes. | ||
| + | |||
| + | *[[File:sposta.png]]: These buttons allow you to move the control to another sash while disabling it on the others. This is useful if different operations need to be performed on the sashes. The current sash will be highlighted in white. | ||
*[[File:controllimontanti.png]]: Pressing this button will make all sashes identical to the left sash. | *[[File:controllimontanti.png]]: Pressing this button will make all sashes identical to the left sash. | ||
| Line 49: | Line 53: | ||
{{BR}} | {{BR}} | ||
| - | == | + | ==Additional controls== |
| - | *'''Formula, '''Machining''', '''Accessories''': Pressing these buttons allows the management of formulas, machining and accessories related to mullions, transoms and muntins. | + | *'''Formula''', '''Machining''', '''Accessories''': Pressing these buttons allows the management of formulas, machining and accessories related to mullions, transoms and muntins. |
| - | *''' | + | *'''Inserts''':This box is for assigning any carryover profiles to the mullions or transoms, not to the muntins. |
Latest revision as of 15:59, 6 February 2025
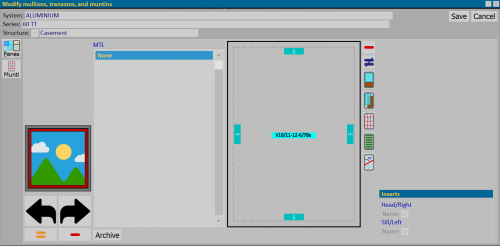
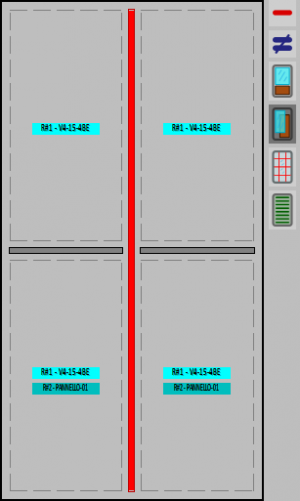
The central area of the framework represents the mirroring within which you must place the transoms, mullions, muntin, or fillers. In short, all operations on the mirroring should be done in this area.
Below are the framework contents:
- System, Series, Structure: They show the system, series, and structure they belong to, respectively. They are not directly editable.
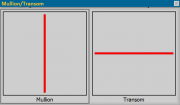
- Assignment of mullions or transoms: To assign mullions or transoms, click inside the Active area. The following pane will open, and then you click on one of the two buttons to enter a mullion or a transom.
Contents |
Archive buttons
 :opens the management framework of the typology management.
 : open the muntins management framework.
Action keys
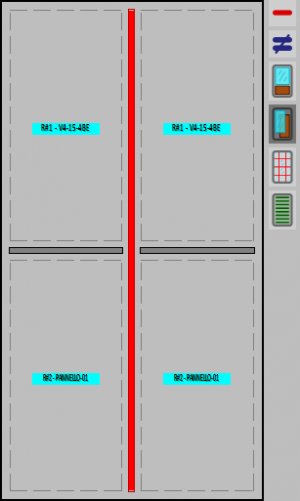
 Placement of panes(glasses, panes or slatted panes): After defining the typology panes, you can place them in the various mirrors by pressing this button first, called positioner, and then selecting with the mouse pointer the part of the mirror where you want to place the pane, as many times as necessary until the code of the pane itself appears. Please know that a code like R#1 or R#2 or R#3 etc... means that it is a nonexistent pane or it has been created, but the glass (or panel) code is missing.
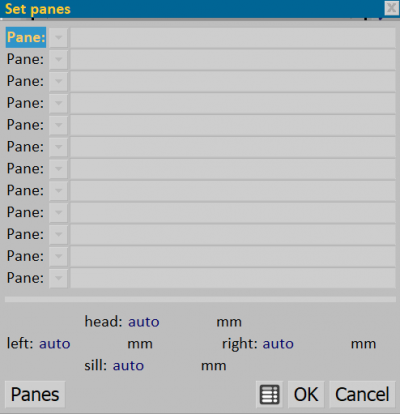
 Panesoverlap: after defining typology panes and after setting them in the place you prefer (as explained in the previous paragraph), through this button you can place a pane where one already exists by first pressing the button and then selecting the mirroring where you want to place the pane:
will open the panel on the side, where we will add the pane to be overlapped. This procedure is useful in case of overlapped pane on a single mirroring (ex: glass+panel)
 Deactivation/Activation of muntin:if the profiles for the muntin have been defined, in the muntins archive, the muntin will appear on all the mirrors of the structure because by default the program considers all the mirrors to be active.
However, by pressing this button and selecting the part of the mirroring chosen with the mouse pointer, it will be possible to activate or deactivate the chosen muntin. This is useful, for example, to be able to make structures with muntins only in the upper mirroring or on the lower mirroring.
 Deactivation/Activation of shutter: is used to deactivate the shutter in a mirroring; after pressing this key you will have to click in the chosen mirroring.
 Profile inclination: opens a panel in which the profile inclination can be set. The button is activated only for transoms within the mirroring.
Sash management
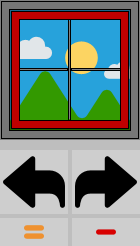
This group of elements is used to choose the sash on which to operate. In fact, in the case of windows with several sashes, it is possible to make all the operations only on one sash, as explained in the previous paragraphs, i.e., assignment of transoms or mullions, muntins, overlapped fillers, etc…
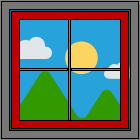 : This element shows the structure by highlighting in white the current frame, that is, the one on which the operation will take place. Normally, in the case of structures with more than one sash, the operation will occur on all sashes.
 : These buttons allow you to move the control to another sash while disabling it on the others. This is useful if different operations need to be performed on the sashes. The current sash will be highlighted in white.
Additional controls
- Formula, Machining, Accessories: Pressing these buttons allows the management of formulas, machining and accessories related to mullions, transoms and muntins.
- Inserts:This box is for assigning any carryover profiles to the mullions or transoms, not to the muntins.
